This month the NMRA British Region is running a building challenge for members with a completion date of 1st March. I'm coming to this a little late as I didn't know about the challenge until I read the latest issue of Roundhouse, just a month remaining so I will need to get my skates on but decided to try and enter anyway. :)
I moved into a new house with a garage over the summer and finally have a space to model without hogging the kitchen table. I was looking for an excuse to unpack some of my modelling stuff, and this challenge seems like a good excuse. I've got lots of building kits sitting in boxes but one of them struck me as being ideal for this purpose. Its an old Woodland Scenics gas station I bought second hand on e-bay for a couple of quid.
This kit is unusual because it is cast in white metal rather than resin or plastic, and it should build into a very dinky little model of a pre-war gas station, complete with old style pumps.
The kit is unboxed and has no instructions or decals, so although it looks simple to construct I will need to get busy with photoshop and the inkjet to rustle up some suitable signage.
The white metal castings area bit warped, but that shouldn't be a problem with such a rustic style of building, and there is a lot of flash to clean up which will be the first task.
I'm planning to incorporate the finished building into a 12" square base so it can be entered into the square footer competition at the convention (assuming that category features).
The diorama will have an old 60's billboard advert and a section of highway. I doubt I will get all of that done by the end of the month, but hopefully the building will be finished at least.
Showing posts with label Kit. Show all posts
Tuesday, 3 February 2015
Wednesday, 30 January 2013
Superior bakeries and more vintage kits.
Spurred on by the Art Curren kit mingling project, I landed another haul of vintage kits from the 'bay, including a pair of Revell Superior Bakeries - one boxed and the other pre-built, I've lost count of how many of these I have now but it must be at least a dozen.
I also picked up an Atlas Lumber Yard with office, another of those classic kits that must have featured on pretty much every US outline layout ever made, as well as numerous kit-bashing articles and features over the years.
The final kit in this lot is a vintage Heljan NMRA Headquarters Building, a curious model that replicates the custom built building in Chattanooga, TN that houses the administration staff for the NMRA.
The real-life building has been designed to look like a typical railroad station and is complete with overhanging roof and upper viewing tower.
The kit contains the usual Heljan pre-coloured plastic components and captures the shape of the building well, although I'm not sure of the colour chosen as the kits dark red brick seems at odd with the images I have seen of the real building.
The kit seemed like it would be a good starting point for a kitbash into a smaller station building, and as it was going cheap I picked it up. However looking at the parts it has a few problems, including poor fit and also a large section of the wall has the NMRA sign and logo cast into the plastic.
These kits will join the growing pile of vintage plastic in the spare room, which more than ever resembles the stockroom of an eighties model shop! I really do need to get some more listings onto ebay to clear some space.
Saturday, 17 March 2012
I'm gonna take you down... to Lee Town
Continuing the HO scale vehicle theme, this whitemetal Lee Town GMC Astro kit was going cheap on ebay so I picked it up. This is kit #432-3015 GMC Astro with tandem axle and 37' Drop Center Tandem Trailer.
As far as I can tell, Lee Town were an eighties manufacturer so this kit was probably a very contemporary model when it was issued.
Lee Town are no longer in business but the majority of the range is now distributed by Alloy Forms and currently in-stock at Walthers.
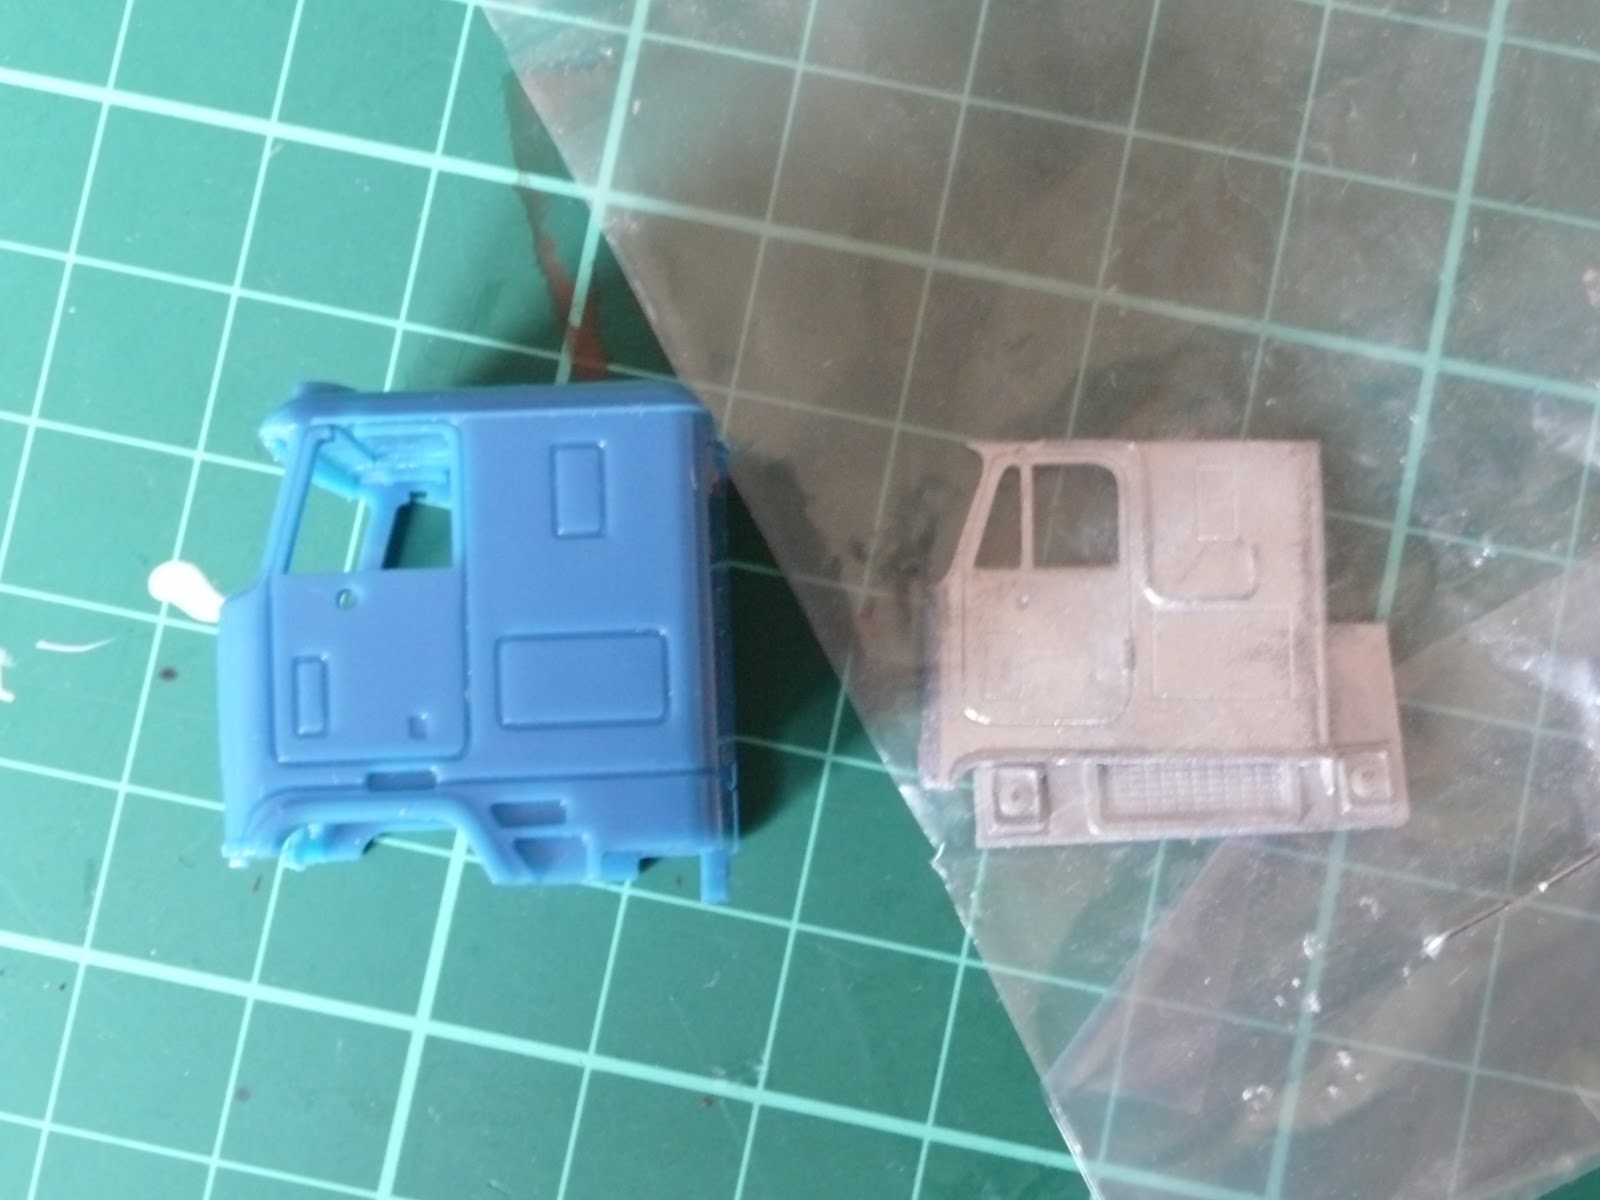
I had expected this truck to be identical to the Lindberg/Revell version, but it turned out to be a slightly different version of the GMC cab.
The plastic trucks feature the more refined step area and lower edge of the cab, with steps built into a more aerodynamic fairing. The Lee Town metal version is a more basic body style with a flat edge to the cab base and a more functional step arrangement.
Lee Town body style.
Lindberg body style.
It looks like the Lindberg kit depicts a late seventies/early eighties cab, but the highest specification of the GMC Astro, with the larger grille and the extra detailing. The basic version of the truck would have had a smaller grille and the same flat base as the Lee Town kit.
The Lee Town kit seems to represent a later model year, but a lower specification, with my guess being a model year somewhere around 1984.
As far as I can tell, Lee Town were an eighties manufacturer so this kit was probably a very contemporary model when it was issued.
Lee Town are no longer in business but the majority of the range is now distributed by Alloy Forms and currently in-stock at Walthers.
I had expected this truck to be identical to the Lindberg/Revell version, but it turned out to be a slightly different version of the GMC cab.
The plastic trucks feature the more refined step area and lower edge of the cab, with steps built into a more aerodynamic fairing. The Lee Town metal version is a more basic body style with a flat edge to the cab base and a more functional step arrangement.
Lee Town body style.
Lindberg body style.
It looks like the Lindberg kit depicts a late seventies/early eighties cab, but the highest specification of the GMC Astro, with the larger grille and the extra detailing. The basic version of the truck would have had a smaller grille and the same flat base as the Lee Town kit.
The Lee Town kit seems to represent a later model year, but a lower specification, with my guess being a model year somewhere around 1984.
Saturday, 21 January 2012
The Superior Bakery arrives at last
Here's a look at another recent ebay bargain, a vintage Revell/ConCor/Heljan HO structure kit #9037 'The Superior Bakery' a classic kit and the basis for many kitbashing articles.
I first saw this kit in an old 1985 Model Railroader article on creating the "Hardly Abel Manufacturing Co." by Art Curran, but there have been many other articles over the years showing how to kitbash different industries and buildings utilising this kit.
The original kit was released in the 1950's by Revell and is in itself actually a kind of factory produced kitbash, as the main structure is built reusing the components of the Revell #9028 two stall engine house.
You can see how the walls and roof are shared between the two kits, along with many of the detailing parts. The bakery includes a section of sidewalk, trash bin and lightpole, as well as various vents and chimneys not included with the engine shed version.
I bought this kit very cheaply on ebay, it was advertised as being complete but opened, so that meant I was bale to get it a lot cheaper than the 'collectors' price that sealed versions are going for. I have seen this same kit go as high as £30 ($45usd) which is a bit beyond the level I would feel comfortable bidding to. I only paid £7 ($10usd) for this one which means it is not too expensive to actually build.
Parts-wise, the kit includes pieces cast in a variety of colours, and printed glazing material with green window bars, plus a set of vintage posters and a colourful decal sheet.
So a pretty good deal for such a rare kit. Problem is... to make the "Hardly Abel Manufacturing Co." I need two of them...!
I first saw this kit in an old 1985 Model Railroader article on creating the "Hardly Abel Manufacturing Co." by Art Curran, but there have been many other articles over the years showing how to kitbash different industries and buildings utilising this kit.
The original kit was released in the 1950's by Revell and is in itself actually a kind of factory produced kitbash, as the main structure is built reusing the components of the Revell #9028 two stall engine house.
You can see how the walls and roof are shared between the two kits, along with many of the detailing parts. The bakery includes a section of sidewalk, trash bin and lightpole, as well as various vents and chimneys not included with the engine shed version.
I bought this kit very cheaply on ebay, it was advertised as being complete but opened, so that meant I was bale to get it a lot cheaper than the 'collectors' price that sealed versions are going for. I have seen this same kit go as high as £30 ($45usd) which is a bit beyond the level I would feel comfortable bidding to. I only paid £7 ($10usd) for this one which means it is not too expensive to actually build.
Parts-wise, the kit includes pieces cast in a variety of colours, and printed glazing material with green window bars, plus a set of vintage posters and a colourful decal sheet.
So a pretty good deal for such a rare kit. Problem is... to make the "Hardly Abel Manufacturing Co." I need two of them...!
Monday, 16 January 2012
Benson bits and pieces - bargains for the parts bin.
One of my favourite areas of any model railroad show is the secondhand sales tables, I'm always keen to pick up a bargain or a bag of bits for the parts bin and this weekends Benson NMRA meet was no exception.
The bring-and-buy tables were packed with all kinds of kits and bits, including a huge collection of 'O' gauge and a massive selection of Walther Amtrak coaches, along with the usual Athearn blue box and other assorted HO stock.
I picked up a number of cheap items that caught my eye, although all of them are very definitely going to be filed in the parts bin or added to the 'to do' list.
This Railpower SD60M (bizzarely painted in Warbonnet scheme) was a great deal at only £6, worth it for the trucks, plow and cables alone, I will probably strip the shell and rebuild it as a different roadname at some point.
This Dummy GP60 was only £3 and will make a good parts loco, or I may add a motor and sell it on.
A dash 9 shell minus one of it's fuel tank sides for 50p
Four DPM/Rix buildings for £9, these will clean up nicely to fill out my next freemo module.
A vintage Heljan/Con-Cor kit for a Ford C Auto Transporter. All the parts seem to be there, including the transfers and instructions. This was £3 but I'm already thinking that it might be too rare to build and perhaps would be best sold on to a collector instead.
There were several more items that caught my eye, including a number of Athearn blue box Railbox cars at £2 each, but I opted to save those for another day (i've got several on the to-do list already) and having reviewed the sheer number of projects waiting in boxes here in the house, I reckon I might need to do a bit of a spring clean and sell on some of the less likely projects before my next purchasing trip.
The bring-and-buy tables were packed with all kinds of kits and bits, including a huge collection of 'O' gauge and a massive selection of Walther Amtrak coaches, along with the usual Athearn blue box and other assorted HO stock.
I picked up a number of cheap items that caught my eye, although all of them are very definitely going to be filed in the parts bin or added to the 'to do' list.
This Railpower SD60M (bizzarely painted in Warbonnet scheme) was a great deal at only £6, worth it for the trucks, plow and cables alone, I will probably strip the shell and rebuild it as a different roadname at some point.
This Dummy GP60 was only £3 and will make a good parts loco, or I may add a motor and sell it on.
A dash 9 shell minus one of it's fuel tank sides for 50p
Four DPM/Rix buildings for £9, these will clean up nicely to fill out my next freemo module.
A vintage Heljan/Con-Cor kit for a Ford C Auto Transporter. All the parts seem to be there, including the transfers and instructions. This was £3 but I'm already thinking that it might be too rare to build and perhaps would be best sold on to a collector instead.
There were several more items that caught my eye, including a number of Athearn blue box Railbox cars at £2 each, but I opted to save those for another day (i've got several on the to-do list already) and having reviewed the sheer number of projects waiting in boxes here in the house, I reckon I might need to do a bit of a spring clean and sell on some of the less likely projects before my next purchasing trip.
Labels:
2012,
Athearn,
Benson,
blue box,
DPM,
heljan,
Kit,
NMRA,
Railpower Products,
sd60m,
three window cab,
Winter Meet
Thursday, 29 December 2011
Building Project #1 - Roberts Dry Goods
Today I started building my first structure kit in twenty years. This is a Design Preservation Models kit #10200 - Roberts Dry Goods.
This is also my first time building a DPM kit, because when I was modelling US outline back in the late eighties there was nowhere in the UK to buy these kits from, I had to make do with enviously looking at the pictures and reviews in Model Railroader magazine.
I bought this kit from LSWR Penguin at a show a few months ago and it has been sitting on the 'to do' list ever since. For a while I had it taped together and placed on my freemo baseboard to check the size of space I need for the town section on my board. I will have five buildings in the completed town - a mixture of DPM and RIX kits.
The kit is moulded in large, simple sections with doors and windows as one-piece. The components are plastic and the kit includes a piece of plasticard to make the roof and some clear plastic for glazing.
The kit has a fair amount of flash and moulding tabs that need to be cut off before assembly.
The edges of the walls are not square, so some sanding is required to make sure that everything joins together without gaps. I have ordered a Northwest Short Lines 'True Sander' which will make this job easier, but in the meatime I used the edge of a wooden box as a makeshift square edge. A few seconds of sanding and the walls are square enough to assemble.
I added strips of square profile evergreen styrene to reinforce the corner joints, and I used a metal square edge to keep everything straight while assemblinf the walls.
The kit goes together very quickly and after a short while the main structure is complete. The outer walls meet with only a thin edge to show where the flat edge of the wall is glued together. I expect some careful scribing will help to make the join invisible.
The final step is to assemble the three sections that make up the front entrance to the store. These require a little extra sanding to make sure they are true, then they glue together as a sub-assembly before attaching to the front of the store.
With the walls completed, the next step will be to add the roof and prepare the building for painting.
This is also my first time building a DPM kit, because when I was modelling US outline back in the late eighties there was nowhere in the UK to buy these kits from, I had to make do with enviously looking at the pictures and reviews in Model Railroader magazine.
I bought this kit from LSWR Penguin at a show a few months ago and it has been sitting on the 'to do' list ever since. For a while I had it taped together and placed on my freemo baseboard to check the size of space I need for the town section on my board. I will have five buildings in the completed town - a mixture of DPM and RIX kits.
The kit is moulded in large, simple sections with doors and windows as one-piece. The components are plastic and the kit includes a piece of plasticard to make the roof and some clear plastic for glazing.
The kit has a fair amount of flash and moulding tabs that need to be cut off before assembly.
The window edges need to be carefully trimmed to remove flash otherwise the uneven edges will show up when the details are painted.
The edges of the walls are not square, so some sanding is required to make sure that everything joins together without gaps. I have ordered a Northwest Short Lines 'True Sander' which will make this job easier, but in the meatime I used the edge of a wooden box as a makeshift square edge. A few seconds of sanding and the walls are square enough to assemble.
I added strips of square profile evergreen styrene to reinforce the corner joints, and I used a metal square edge to keep everything straight while assemblinf the walls.
The kit goes together very quickly and after a short while the main structure is complete. The outer walls meet with only a thin edge to show where the flat edge of the wall is glued together. I expect some careful scribing will help to make the join invisible.
The final step is to assemble the three sections that make up the front entrance to the store. These require a little extra sanding to make sure they are true, then they glue together as a sub-assembly before attaching to the front of the store.
With the walls completed, the next step will be to add the roof and prepare the building for painting.
Subscribe to:
Posts (Atom)


.jpg)